
In 1960, David Latimer created a remarkable sealed bottle garden, which has thrived ever since, and still continues to this day. The bottle garden is a self-contained ecosystem, complete with its own water cycle and a miniature rainforest of plants. What’s even more amazing is that the bottle garden has not been opened since 1972 and has been entirely self-sufficient for over 50 years.
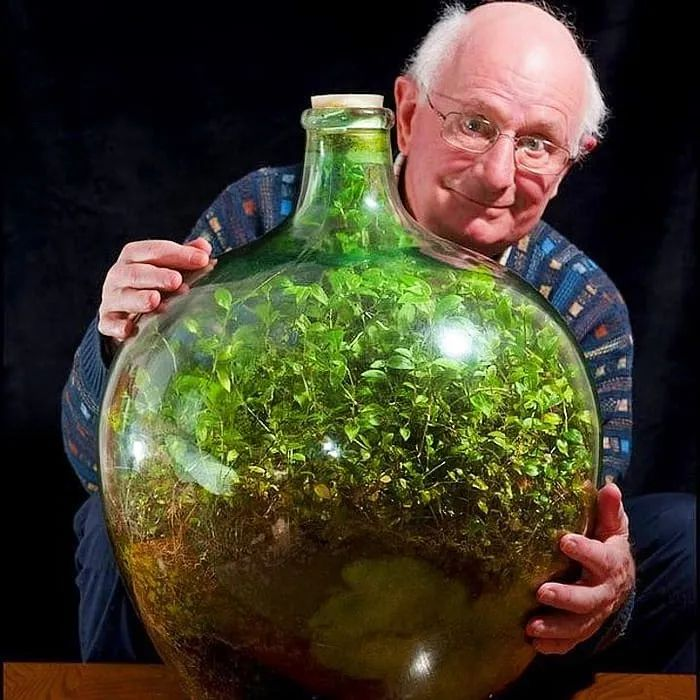
The sealed bottle garden was a project that David Latimer had started as a simple experiment, but it has now become a fascinating story of enduring life. To create the garden, Latimer used a ten-gallon glass bottle, filled it with compost, and carefully planted four small plants inside. He then added a pint of water to the bottle, sealed the bottle’s opening with a cork, and placed it near a sunny window.
The plants that Latimer chose for his garden were Tradescantia, a type of spiderwort plant, and a Selaginella, a type of spike moss. Both of these plants are well suited to low-light conditions and can tolerate high levels of humidity. The garden’s initial planting was a success, and the plants grew quickly, soon filling the bottle with lush greenery.
One of the most amazing things about the sealed bottle garden is that it has maintained its own water cycle. The water inside the bottle is continually recycled by the plants’ natural process of transpiration. As the plants take in water through their roots, they release water vapor through tiny pores in their leaves. This water vapor then condenses on the bottle’s walls and runs back down into the soil, where it is once again available for the plants to use.
Another factor that has contributed to the sealed bottle garden’s success is the garden’s self-contained ecosystem. The compost inside the bottle provides a continuous source of nutrients for the plants, while the carbon dioxide produced by the plants is used by the plants to photosynthesize and produce oxygen. This cycle of oxygen and carbon dioxide has created a perfect balance within the bottle garden.
Want one for your motorhome?
A motorhome bottle garden is a great way to bring some greenery and life into your motorhome or RV. Creating a bottle garden is a fun and easy project that can be done in just a few simple steps.

How to make a motorhome bottle garden:
Materials:
- A glass bottle with a narrow neck (such as a wine bottle or a large glass jar)
- Gravel or small rocks
- Activated charcoal
- Potting soil
- Small plants (such as succulents or air plants)
- Decorative items (such as small figurines, rocks, or moss)
Instructions:
- Start by cleaning your glass bottle thoroughly. Rinse it out with hot water and let it dry completely.
- Add a layer of gravel or small rocks to the bottom of the bottle. This will help with drainage and prevent water from building up at the bottom of the bottle.
- Add a layer of activated charcoal on top of the rocks. The activated charcoal will help to purify the water and prevent any odors from building up inside the bottle.
- Add a layer of potting soil on top of the activated charcoal. Make sure to leave enough space at the top of the bottle for your plants.
- Choose your plants and carefully add them to the bottle. Use a small spoon or trowel to make holes in the soil and place your plants inside. Make sure to choose plants that are small enough to fit through the bottle’s narrow neck and that are well-suited to the amount of light and moisture that your motorhome provides.
- Once your plants are in place, you can add any decorative items that you like. This could include small figurines, rocks, or moss. Be creative and make the bottle garden your own!
- Water your bottle garden lightly, being careful not to over-water. Depending on the plants you have chosen, you may only need to water your bottle garden once a week or less.
- Place your bottle garden in a spot where it will get the right amount of light and moisture. A motorhome bottle garden is a great way to add some life and greenery to your space, and it’s a fun project to do on a rainy day or when you’re feeling crafty.
